For decades, living in the country meant making a difficult trade-off: you got the peace, the privacy, and the acreage, but you lost the high-speed connectivity. Rural homeowners have long been stuck between “legacy” satellite providers with high latency and tiny data caps, or spotty fixed-wireless signals that barely reach over the nearest hill. Starlink has fundamentally changed the landscape of rural life. By utilizing a constellation of thousands of Low Earth Orbit satellites, it finally brings fiber-like speeds to the most remote corners of the world.
However, a Starlink rural installation is rarely as simple as “plug and play.” Between hundred-foot pine trees, wide-open wind-swept plains, and the unique construction of farmhouses and barns, getting a reliable signal requires more than just a box from the mail.
At Installers of Starlink, we specialize in the “difficult” jobs. In this guide, we’ll walk through exactly what to expect when bringing Starlink in the country, how we navigate rural-specific obstructions, and the professional standards we use to ensure your connection remains rock-solid through every season.
The Rural Challenge: Trees, Topography, and Towers
The biggest misconception about satellite internet is that “if you can see the sky, you’re fine.” With Starlink, that is only half true. Because the satellites are moving across the sky at incredible speeds, the dish needs a massive, unobstructed “cone” of visibility.
1. The Tree Problem
In rural areas, trees are the #1 enemy of high-speed internet. A single oak branch or a tall evergreen that clips just 5% of the dish’s field of view can cause your connection to drop every few minutes. While this might be fine for browsing the news, it makes Zoom calls, online gaming, and streaming video impossible.
2. Distance from Cell Towers
Many rural residents look to 5G home internet as an alternative, but if you are more than a few miles from a tower—or if there is a forest or a hill between you and that tower—your speeds will crater. Starlink bypasses the tower problem entirely by looking straight up, but that means the physical installation point on your property becomes the most critical factor in your success.
Our Rural Obstruction Analysis Process
When our technicians arrive for a Starlink rural installation, we don’t just pick the easiest spot on the porch. We use a methodical, data-driven process:
Professional Site Survey: We use specialized equipment to map the “bore sight” of the dish. We don’t just look for current obstructions; we account for seasonal growth. That small maple tree might not be a problem in April, but by July, its leaves could block your entire signal.
Height is Your Friend: In the country, we often have to get creative to find a clear sky. This might mean mounting the dish on a custom-built tower, a tall gable end of a barn, or even a specialized “tree mount” if no other clearing exists.
Secondary Structure Integration: Sometimes the house is surrounded by trees, but a shop or a barn 100 feet away has a perfect view of the sky. We are experts at installing the dish on secondary structures and bridging that connection back to the main house using high-speed exterior-rated cabling or wireless point-to-point bridges.
Mounting Starlink to Metal Roofs: The Rural Standard
A significant percentage of rural homes, shops, and barns feature metal roofing. Whether it’s standing seam or corrugated metal, these surfaces require a specialized touch.
The Pros of Metal Roofs
- Metal is an ideal surface for a permanent mount because it is incredibly structural. When we anchor into the purlins (the wooden or steel supports) beneath the metal, the dish isn’t going anywhere, even in high-wind rural corridors.
The Cons of Metal Roofs
- Metal expands and contracts significantly as it heats up in the sun and cools at night. If you use a cheap, rigid sealant or the wrong mounting bracket, that movement will eventually tear the metal or break the waterproof seal. Furthermore, bare metal is dangerously slick, making DIY attempts on rural rooftops highly hazardous.
Our Metal Roof Mounting Options:
Standing Seam Clamps: If your roof has raised ribs, we use non-penetrating clamps (like S-5! clamps). These grip the metal seam with rounded set screws, providing massive holding power without ever drilling a hole in your roof.
Corrugated/Ribbed Mounts: For standard metal panels, we use penetrating mounts anchored directly into the structural purlins. We use a “triple-seal” method to ensure these points remain 100% watertight for decades.
Ridge Mounts: On many barns and farmhouses, the ridge cap is the highest and clearest point. We utilize ridge-straddling mounts that offer a perfect sky view while maintaining a clean, professional aesthetic.
Safety First: Ladder Best Practices in the Country
Rural installations often involve high rooflines and uneven terrain. Safety is our non-negotiable priority. If you are ever attempting to work on your own rig, you must follow these technician-standard safety rules:
The 4:1 Ratio: For every 4 feet of height, the base of the ladder should be 1 foot away from the wall.
Leveling is Key: Rural ground is rarely flat. We use professional ladder levelers to ensure the ladder is perfectly vertical, even on a slope.
Stabilizers: We use “standoff” stabilizers that keep the ladder away from your gutters. This prevents the ladder from sliding sideways on slick metal or vinyl surfaces.
Never Climb a Wet Metal Roof: A metal roof with even a tiny bit of morning dew is essentially a sheet of ice. Our technicians are equipped with specialized high-traction roofing shoes and, where necessary, full fall-arrest harnesses and anchors.
Professional Installation Do's and Don'ts
THE DO’S
DO use a Drip Loop: This is the most common DIY mistake. We always create a downward “U” shape in the cable just before it enters your home. This forces rainwater to drip off the bottom of the loop rather than following the cable inside your wall.
DO space your clips correctly: To prevent the wind from “whipping” the cable against your siding, we use UV-rated cable clips. Our standard is one clip every 12 inches on vertical runs and every 18 to 24 inches on horizontal runs.
DO use the right Sealant: For roof work, we strictly use polyurethane or butyl rubber lap sealants. These remain flexible and move with the metal. For wall penetrations, we use a high-grade exterior silicone caulk.
DO protect the cable: In rural areas, rodents and weed-whackers are real threats. We route cables through protective conduit where they are close to the ground or in high-traffic areas.
THE DON’TS
DON’T cut the proprietary cable: The Gen 3 (4X unit) cable is a specialized, shielded wire. Cutting and splicing it yourself ruins the shielding and almost always causes signal drops or power issues.
DON’T forget the length limit: The Standard Gen 3 kit includes a 15-meter (49.2-foot) cable. In large rural homes, this often isn’t enough. We carry 147-foot extensions on our trucks to ensure the router ends up exactly where you need it.
DON’T mount near chimneys or vents: Smoke and heat can degrade the high-tech sensors on your dish. We always maintain a minimum 5-foot clearance from any exhaust source.
DON’T use “Bathroom” Silicone on the roof: Clear silicone from the hardware store will fail within one year of sun exposure. If it’s on the roof, it needs to be a professional-grade lap sealant.
Why Hire a Professional for Your Rural Setup?
Getting Starlink in the country is an investment in your lifestyle and your property value. A “hanging out the window” DIY install might work for a few weeks, but it won’t survive a rural winter or a spring thunderstorm.
At Installers of Starlink (a DBA of Starlink Installation Techs LLC), we are a team of professional, fully insured technicians. We don’t just “put a dish on a roof”—we optimize your entire home network. We understand the chemical requirements of different roofing membranes, the aerodynamic stress of rural winds, and the networking needs of a modern country home.
Our Nationwide Promise:
Fast Scheduling: You shouldn’t have to wait months for high-speed internet. Our nationwide average scheduling time is just 3 days.
Efficient Service: Our technicians complete the entire Starlink rural installation in an average of 3 hours or less.
Comprehensive Solutions: We provide nationwide Starlink installation services for residential, commercial, mobile, and marine needs across all 50 states.
From the woods of Wisconsin to the plains of Wyoming, we bring the internet to where you are.
Ready to get scheduled? Call us at (877) 309-1050, fill out our free quote form or reach us via live chat—and expect a response in about 5 minutes. We’re available Monday through Friday, 6:00 AM to 11:00 PM, and weekends from 6:00 AM to 9:00 PM.
Connectivity News & Updates
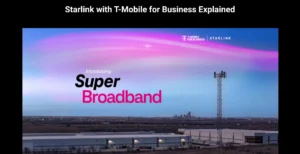
T-Mobile Starlink Business Internet: SuperBroadband Explained
T-Mobile Starlink business internet officially became a real product on...
Starlink in Rural Areas – What to Expect and How We Make It Reliable
For decades, living in the country meant making a difficult...
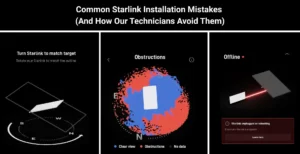
Common Starlink Installation Mistakes (And How Our Technicians Avoid Them)
When you receive your Starlink kit, the “plug-and-play” marketing makes...
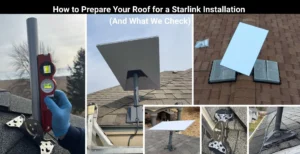
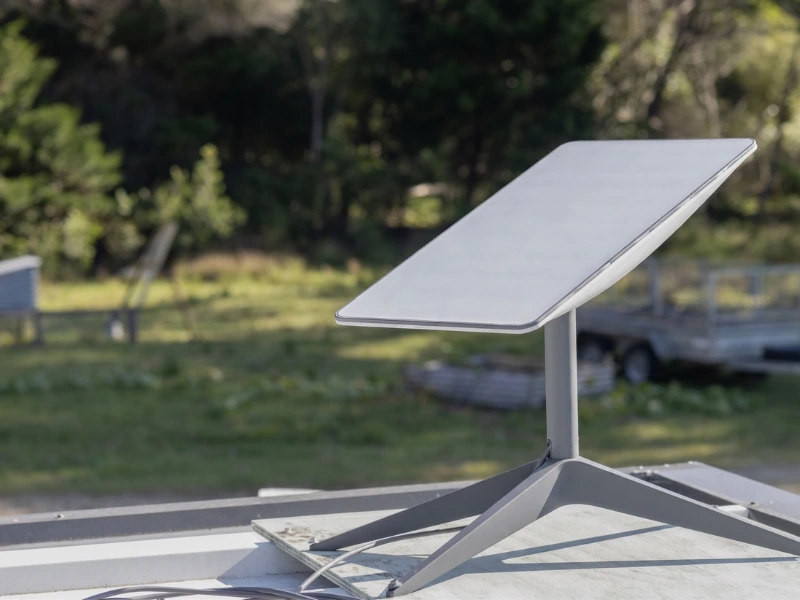
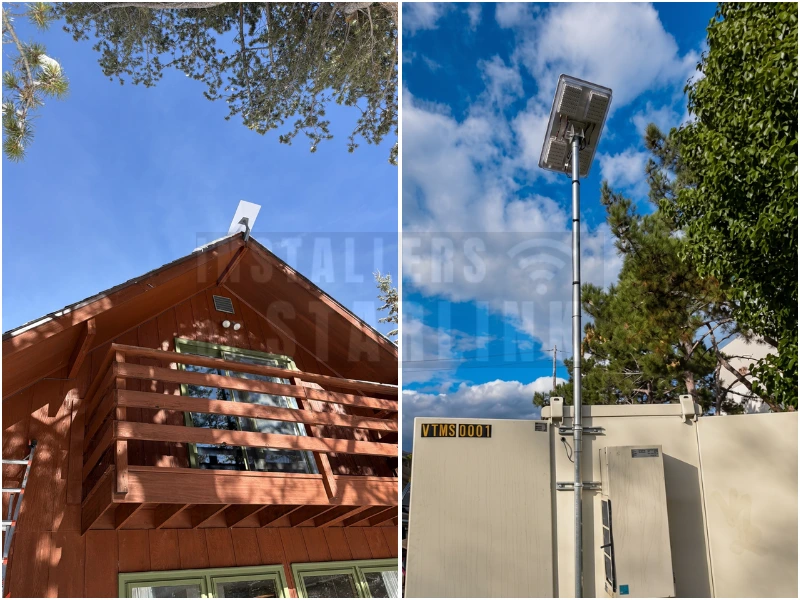
How to Prepare Your Roof for a Starlink Installation (And What We Check)
Wondering how to prepare your roof for a Starlink installation?...
