Common Starlink Installation Mistakes (And How Our Technicians Avoid Them)

When you receive your Starlink kit, the “plug-and-play” marketing makes it look incredibly simple. SpaceX has done a brilliant job of creating a user-friendly interface, but there is a massive difference between “getting it to work” and a professional, long-term installation that survives the elements and provides maximum speeds.

Starlink Gen 3 dish sitting on the edge of a flat commercial roof against a clear sky, perfectly positioned to deliver the best possible Starlink performance speeds.

Every week, our teams are called out to properties to troubleshoot Starlink dish alignment problems or fix Starlink installation mistakes made by DIYers or uncertified local handymen. These mistakes don’t just lead to slower internet; they can lead to roof leaks, voided hardware warranties, and even structural damage to your home or office.

In this guide, we’re going behind the scenes to show you exactly where most installations go wrong and, more importantly, how our professional technicians ensure your system is installed correctly the first time.

1. The "Good Enough" Obstruction Mistake

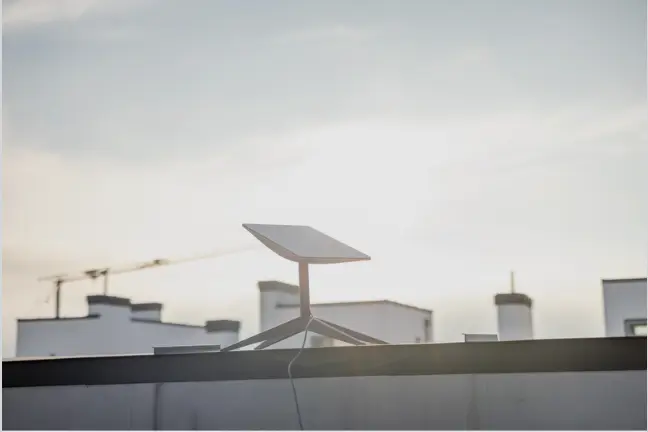
The number one mistake people make is underestimating the “Starlink sky.” Because Starlink satellites are in constant motion in Low Earth Orbit (LEO), the dish needs a wide, unobstructed 110-degree view of the sky.

Many DIYers find a spot on a deck or a lower roofline that seems “mostly clear.” The dish connects, the speed test looks okay, and they think they are done. However, two hours later, their Zoom call drops. This is usually due to a “phantom obstruction”—a tree branch or a chimney corner that the dish only “sees” when a specific satellite passes through that tiny window of the sky.

How We Avoid It: Our technicians do not guess. We use professional-grade site assessment tools to run a 360-degree obstruction analysis before a single screw is driven. We identify the peak of the roof or the specific gable end that provides a 100% clear “bore sight” for the dish. If trees are an issue, we don’t just settle for “good enough”—we utilize specialized mounts or towers to get the dish above the tree line.

2. Using the Wrong Mount for the Roof Type (Especially Metal Roofs)

Not all roofs are created equal, and using the wrong mounting hardware is a recipe for disaster. This is especially true for metal roofs, which are increasingly common in rural residential and commercial settings.

The Problem with Metal Roofs

Metal roofs are dynamic. They expand and contract significantly with temperature changes (thermal cycling). A rigid mount screwed directly into a metal panel without considering this movement will eventually work its way loose or, worse, tear the metal.

Our Metal Roof Solutions:

  • The “No-Hole” Method (Standing Seam Clamps): For standing seam metal roofs, we avoid drilling entirely. We use specialized structural clamps (like S-5! clamps) that grip the raised ribs of the roof. This provides incredible wind resistance without ever piercing the metal or voiding your roof warranty.

  • Ridge Mounts: We often utilize ridge mounts that straddle the peak of the roof. By anchoring into the structural ridge beam, we ensure the dish is at the highest possible point while maintaining a watertight seal.

  • The Pro/Con of Penetrating Mounts: Sometimes, a penetrating mount is the only option (such as on corrugated metal). The mistake most people make is failing to find the structural purlin beneath the metal. Our techs use specialized sensors to ensure we are anchoring into the wood or steel frame, not just the thin metal sheet.

3. The "Silicone Nightmare": Improper Sealing

One of the most common Starlink installation mistakes is using the wrong sealant. We frequently see DIY installs where a homeowner has used standard “bathroom” or “window” silicone from a big-box store to seal a roof penetration.

Why this is a mistake: Standard silicone does not bond well to many roofing membranes (like EPDM or TPO) and it cannot handle the intense UV radiation and thermal expansion of a roof. Within six months, the silicone peels back like a dry scab, and the next rainstorm sends water directly into your attic or ceiling.

How We Avoid It: We use only professional-grade, self-leveling polyurethane or butyl rubber lap sealants. These sealants are designed to stay flexible for 20+ years, moving with the roof as it heats and cools. Whether it is a wall entry or a roof mount, our “triple-seal” process ensures the building envelope is never compromised.

4. Improper Cable Management: The Silent Performance Killer

The cable is the lifeline of your Starlink system. The Standard Gen 3 (4X) kit comes with a proprietary 15-meter (49.2-foot) shielded cable. This cable is highly sensitive.

Common Cable Mistakes:

  • No Strain Relief: Leaving the cable hanging off the dish so that the weight of the wire pulls on the connector. Over time, wind vibration will ruin the internal pins.

  • Sharp Bends: Kinking the cable to get it around a corner. This can break the internal shielding and cause “ghost” disconnects.

  • Lack of Support: Letting the cable “flap” against the side of the house in the wind.

How We Avoid It: Our technicians treat cable routing as an art form. We use UV-resistant, outdoor-rated cable clips. We follow a strict spacing standard: one clip every 12 inches on vertical runs and every 18 to 24 inches on horizontal runs. This prevents “whipping” and ensures the cable never moves, even in a hurricane.

Furthermore, we always include a drip loop. By creating a downward “U” shape in the cable just before it enters the building, we ensure that gravity pulls rainwater off the bottom of the loop rather than following the wire into your wall.

5. DIY Ladder Safety: A Risk Not Worth Taking

It sounds simple, but every year thousands of people are injured in ladder-related falls while trying to install satellite dishes. Amateur installers often use the wrong type of ladder (like a step-ladder on uneven ground) or fail to secure the ladder to the roofline.

How We Avoid It: Safety is our top priority. Our technicians are fully insured and trained in OSHA-compliant ladder safety.

  • The 4:1 Rule: We always set our extension ladders at the correct angle (1 foot out for every 4 feet up).

  • Stabilizers and Standoffs: We use ladder stabilizers to prevent the ladder from crushing your gutters or sliding sideways on a slick metal roof.

  • Fall Arrest: For steep pitches or multi-story commercial installs, our techs utilize full safety harnesses and roof anchors. We take the risk so you don’t have to.

6. Ignoring the "Bypass Mode" and Network Optimization

Once the dish is up, the job isn’t over. Many users experience Starlink dish alignment problems that are actually software issues. They leave the Starlink router in its default state, which can cause “Double NAT” issues if they are trying to use their own mesh Wi-Fi system.

How We Avoid It: Our technicians don’t just mount the dish; we optimize the network. We can configure “Bypass Mode” for you, ensuring your Starlink system plays nicely with your existing Google Nest, Eero, or TP-Link mesh system. We verify that the system is acquiring satellites correctly and run a series of speed tests to ensure you are getting the bandwidth you paid for.

Summary: Starlink Installation Do’s and Don’ts

To keep it simple, here is a quick checklist of the standards our professional technicians follow on every single job:

DO’s:

  • DO use a dedicated cable entry gland for all wall penetrations.

  • DO secure the cable with UV-rated clips every 12–24 inches.

  • DO create a drip loop at every building entry point.

  • DO use polyurethane or butyl rubber lap sealants for roof work.

  • DO confirm your rig’s roof material (EPDM, TPO, or Metal) before selecting a sealant.

DON’Ts:

  • DON’T use standard clear silicone on a roof; it will fail.

  • DON’T cut or splice the proprietary Starlink cable; it ruins the shielding.

  • DON’T mount the dish within 5 feet of a chimney or an A/C exhaust (soot and heat damage the hardware).

  • DON’T attempt a DIY install on a metal roof without proper non-slip roofing shoes and fall protection.

Why Choose Professional Installation?

At Installers of Starlink (a DBA of Starlink Installation Techs LLC), we have seen it all. From dishes held up by duct tape to roofs ruined by improper drilling, we specialize in fixing mistakes and providing “set-it-and-forget-it” solutions.

We provide nationwide Starlink installation services for residential, commercial, mobile, and marine needs. Whether you are a homeowner in a remote forest or a business owner needing backup internet for your warehouse, our certified, insured technicians have the specialized tools and hardware to do the job right.

Our Commitment to You:

  • Fast Scheduling: We know you’re excited to get connected. Our average scheduling time is just 3 days.

  • Efficient Service: Once on-site, our technicians typically complete the entire professional installation in 3 hours or less.

  • Nationwide Coverage: We serve all 50 states, including the most remote rural areas.

Don’t let a DIY mistake turn into an expensive home repair. Trust the experts who have completed thousands of successful installs.

Ready to get scheduled? Call us at (877) 309-1050, fill out our free quote form  or reach us via live chat—and expect a response in about 5 minutes. We’re available Monday through Friday, 6:00 AM to 11:00 PM, and weekends from 6:00 AM to 9:00 PM.

HOME | BLOG | LOCATIONS

Connectivity News & Updates

Leave a Reply

Your email address will not be published. Required fields are marked *